Modify an Active USB Hub to Avoid Power Feeding
Background
One of the more habitual situations when you using a Raspberry pi is deal with USB devices that requires more electric power that the USB connectors of the Raspberry pi can provides. To deal with this situation, a powered USB hub is used.
In the other hand, the latest models of Raspberry pi can be powered throw its standard USB connector, so when you use a powered USB hub usually the Raspberry pi get the power from the USB hub, so the nominal micro-usb power connector is not needed.
This situation is sometimes desirable, but there is a issue: when the Raspberry pi is powered throw its USB connectors instead the nominal micro-usb one, no circuit protection is present (also, is not good idea to power the Raspberry pi throw these BOTH methods).
Avoid the build in power circuit protection is DANGEROUS, especially if some heavy energy consumer devices are attached to the powered USB hub, because then could produce electric issues.
For more info about this, please read this thread and this article.
Some specific models of (high end) powered USB hubs don’t suffer this issue about power feeding, but seems that it is a common problem with the currents and cheap models. More relevant: it is virtually impossible to know if a not tested powered USB hub have power feeding. See some details about this.
In this work, I’ll show a manner to modify a common (and cheap) powered USB hub model for avoid the power feeding. The principle is simple: disconnect the Vcc of the USB connector that link the USB hub with the Raspberry pi. Some guys do this by cutting the corresponding (red) wire of the cable of connection between the USB hub and the Raspberry pi… but I think that this solution is not elegant :D
My powered USB hub is this model (though I bought it for much less). I have also other similar models, but this is the one I finally used for the modification.
This technique is easy, elegant, works, and is applicable too for a wide number of cheap powered USB hubs.
Opening the hub
You must push out the enclosure to open the hub:

Opening the hub
Here is hub opened:
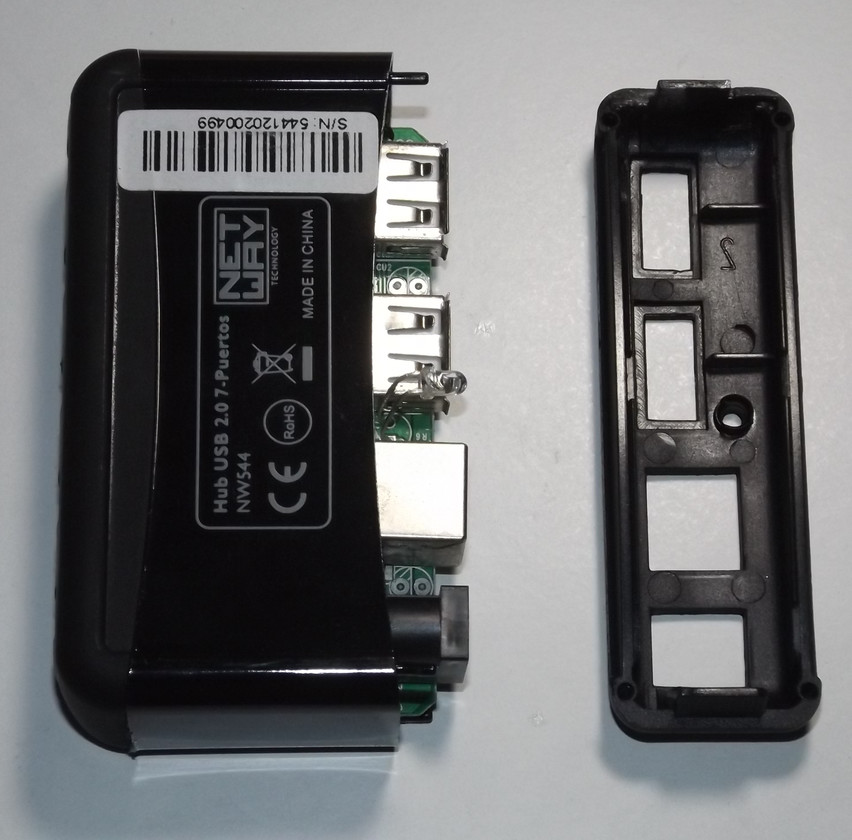
Opened HUB
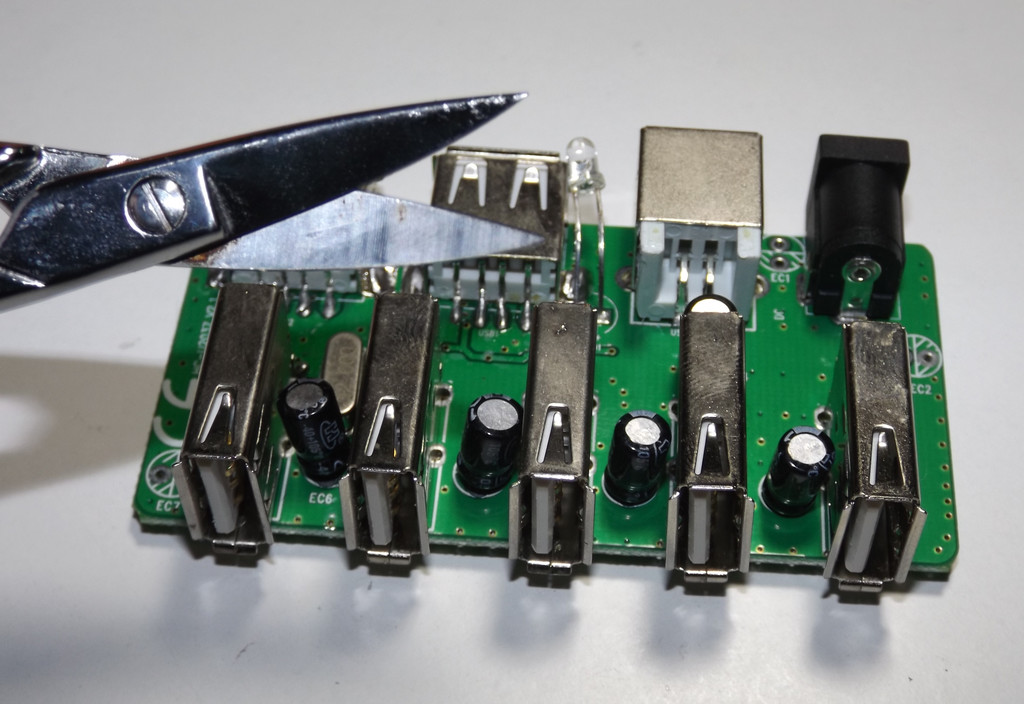
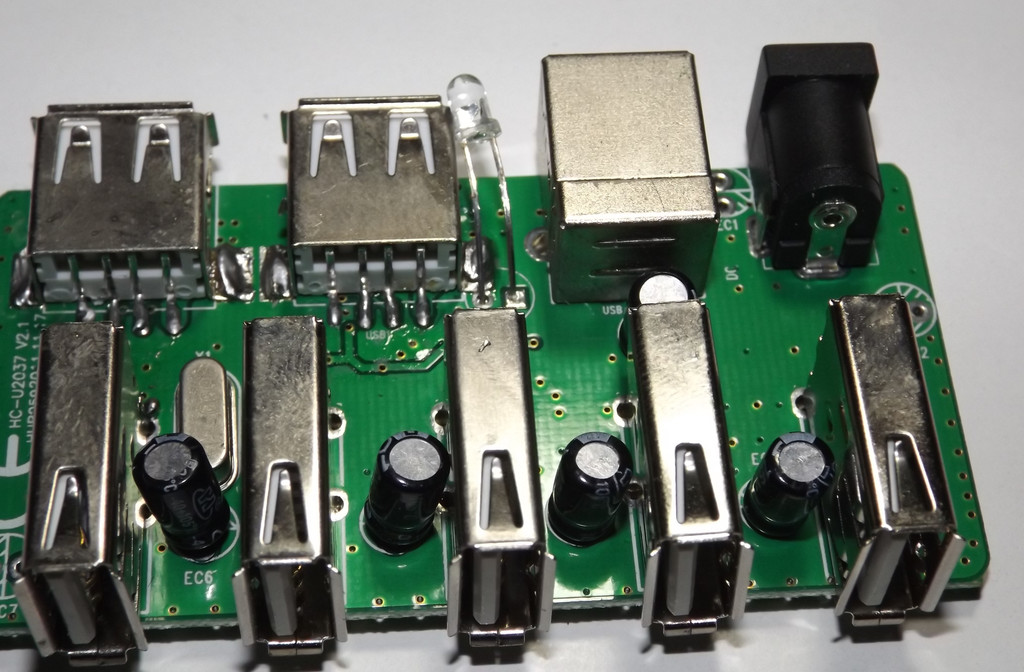
And, finally, we have the extracted internal circuit:
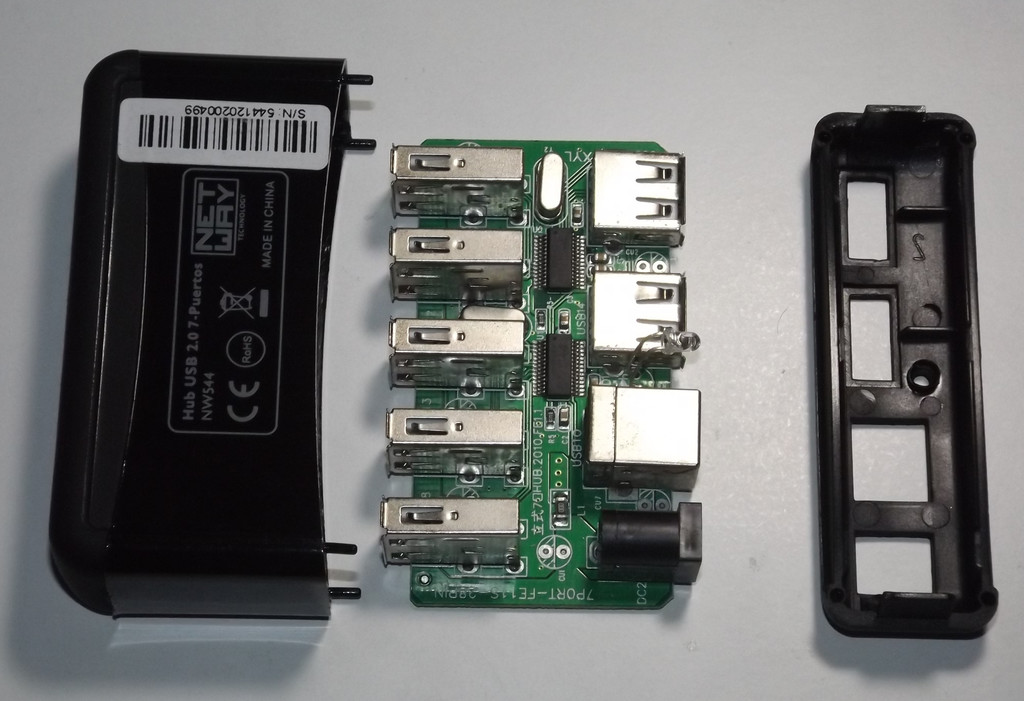
Extracted circuit
Identify the connector to modify
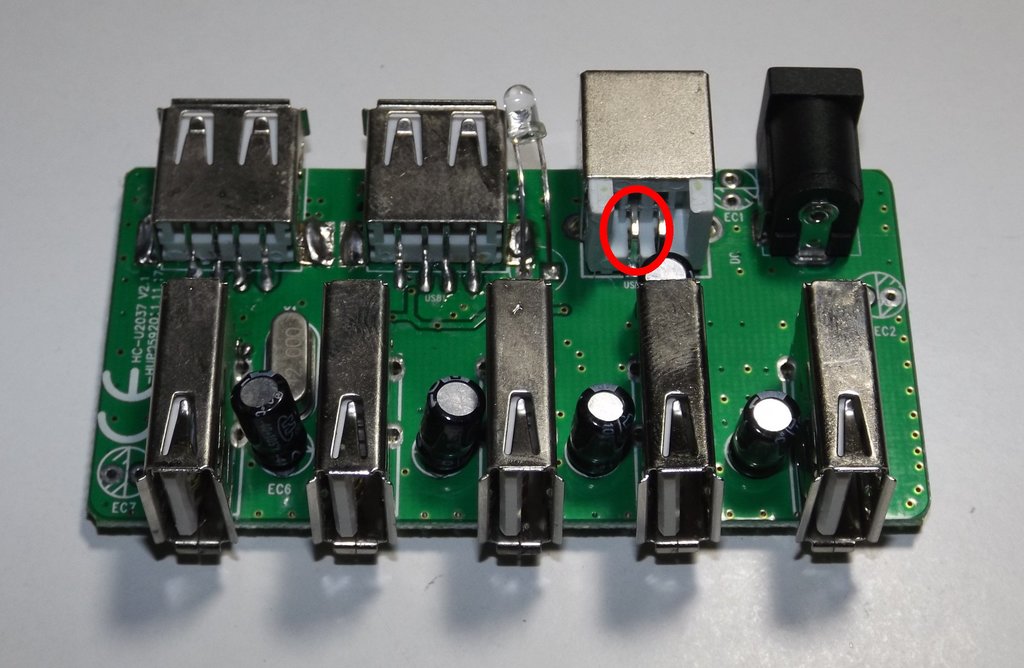
You must identify the right connector to modify. It is the one that is connect to the host, usually a female USB type 2 connector.
For my circuit, the correct connector is signalled by the red arrow in this picture:
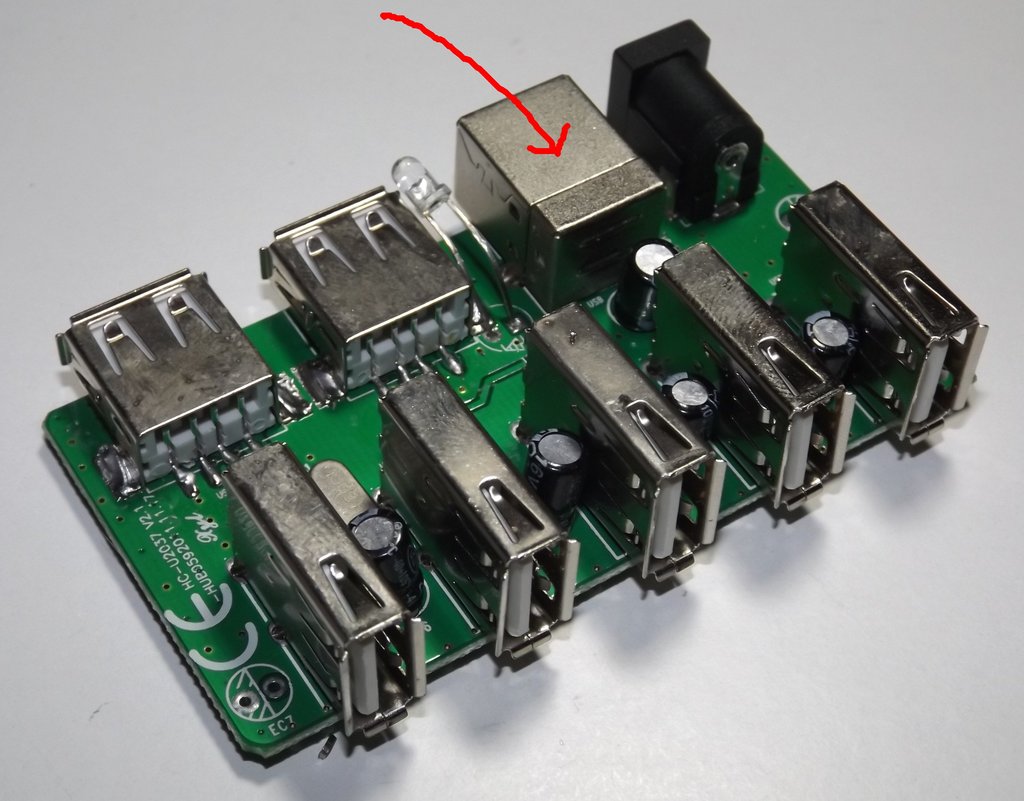
Connector to modify
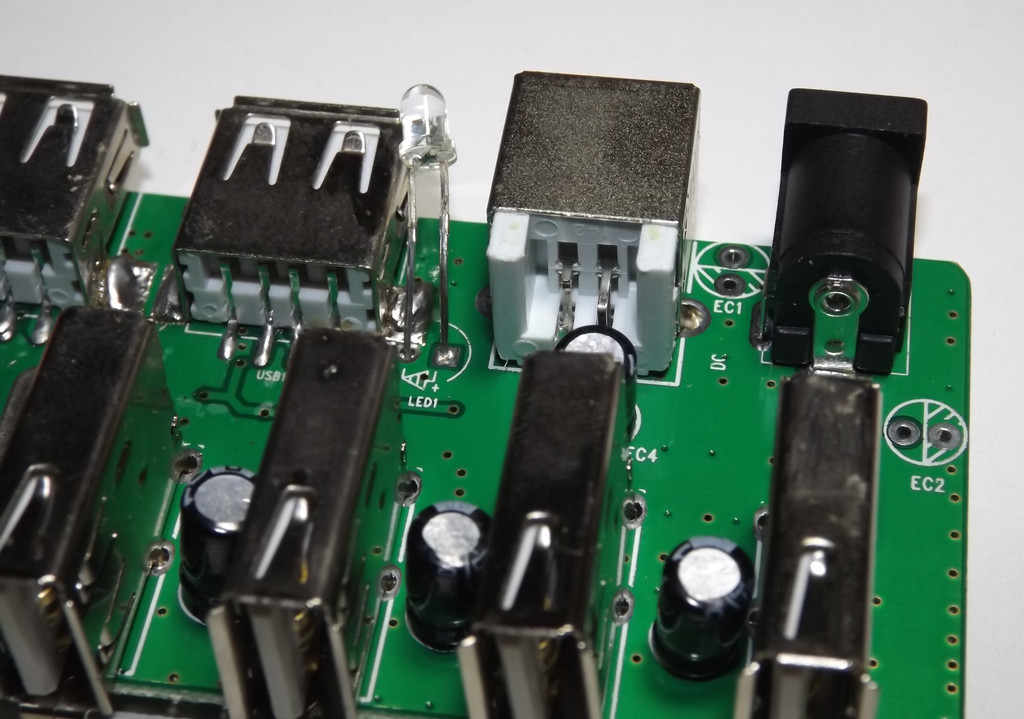
Removing the connector cover
You can use a plain screwdriver for gently remove the back cover of the connector. Attempt don’t damage it:
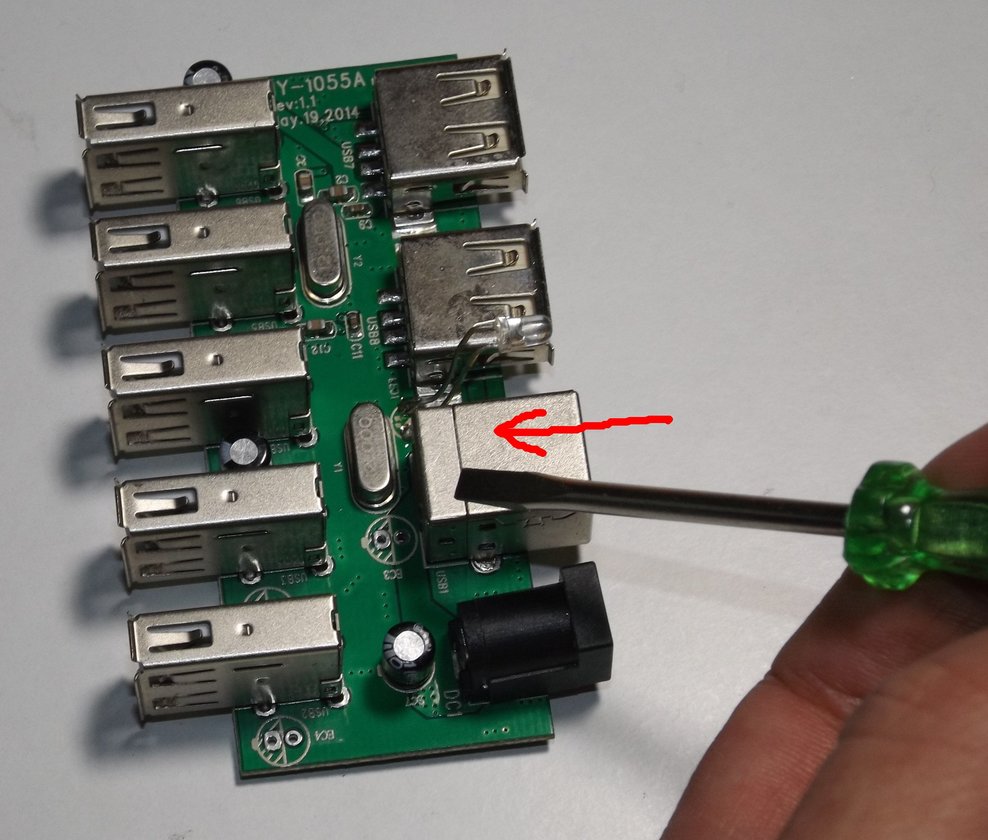
Removing the connector cover
Identify the pin to cut
This is the pinout of the connector to modify. You must disable the power (Vcc) one – image credits:

Connector pinout
Compare the position of your connector with this picture to be sure you identify correctly the pin position for your case – image credits
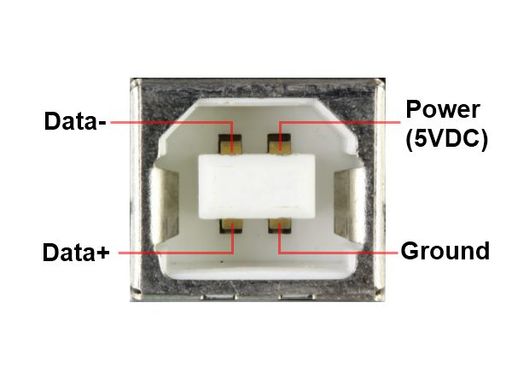
Connector scheme
For my case, this is the pin should be cut:
The pin to cut
Cut the pin
Carefully cut the pin. Eliminate about 2mm of wire for ensure that the ends don’t touch between them. Be carefully or you can cut also the other bottom pin. You are warned: I damaged one of my USB hub due this :(
Cutting the pin
Check the cut
Check that the VCC pin is open and the others are in good condition:
Cut pin
Reinsert the connector cover
If you could don’t damage the connector cover when you removed it, you can return it to its position (this step is optional)
Reinsert the connector cover
Label you new no power feeding hub
Label you new no power feeding hub!!! in this manner, you don’t confuse you new awesome no power feeding hub with some common other.
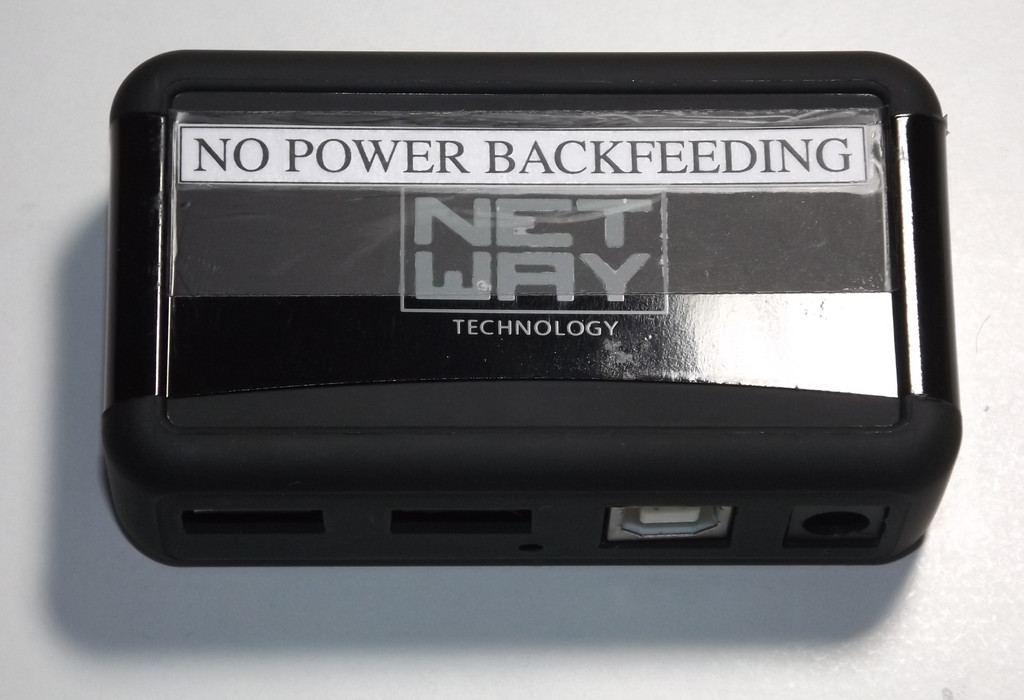
Labelled hub
Final notes
Now, when you plug (and power) the USB hub to the Raspberry pi, it (the Raspberry pi) should not power on. For power the Raspberry pi, you must use the nominal micro-usb power connector, so you really are used the build in electric protection circuit: you can now sleep peacefully!!!
Please note: you can use an independent power supply for power the Raspberry pi or you get the power (by using the appropriate cable) from the USB hub. Just use one of the free USB connectors.